This project introduces a new storage type -- settings. Settings are kept in your device's EEPROM. They are referred to as "persistent storage" because they retain their values even when the device is powered off. Settings are incredibly important, as they provide a way to store your application's operating parameters.
This project builds on the Timers application. It uses a single setting to store the reload value for a (one-shot) timer.
Settings are defined on the Settings page of the Features tab:
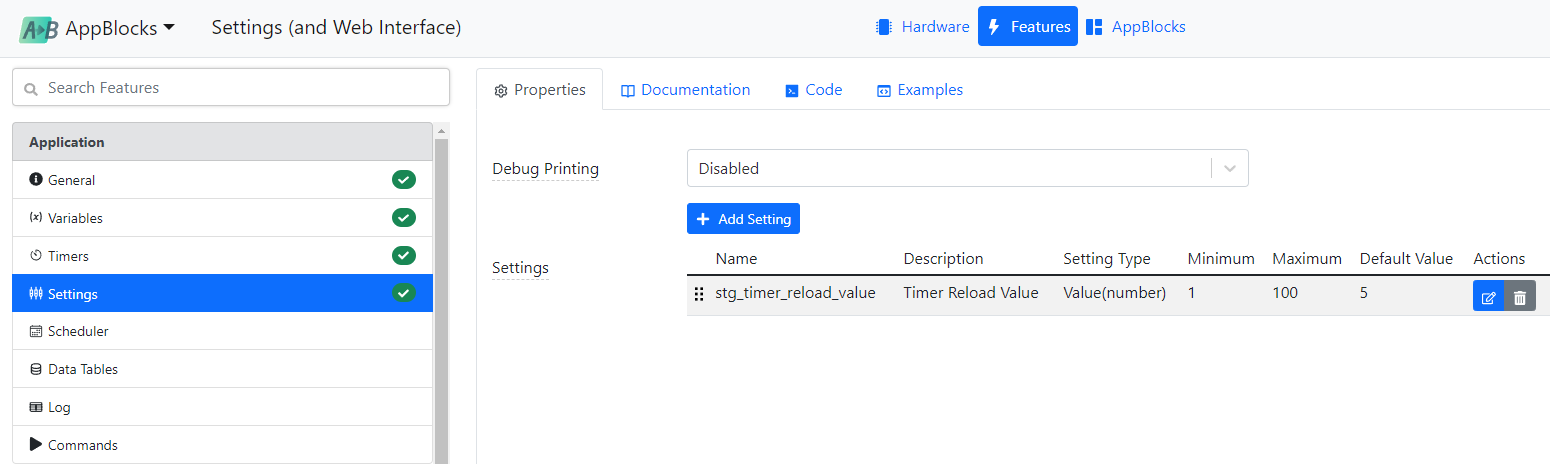
Every time you add a setting, a corresponding variable of the same name is created. This is very similar to (one-shot) timers, which also have corresponding variables.
Settings have the same list of types available to them as variables. You can directly use settings in math expressions, just as you would use regular variables. You will notice that in addition to all the properties variables have, settings of certain types can also be limited in the value range:

Since the settings are stored in the EEPROM, and EEPROMs have the maximum number of write cycles they can endure, avoid designs that constantly rewrite the setting data. Depleting an EEPROM IC is not as impossible as one might think!
Settings as Links to the Outside World
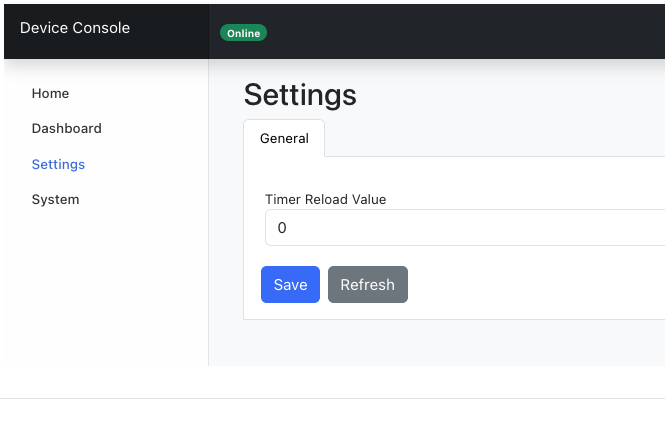
Since settings store an application's operating parameters, it is usually necessary to access them "from the outside." This project facilitates editing its settings through the device's web interface.
The web interface is enabled through the Web Dashboard page of the Features tab. Inside the Web Dashboard, there is a Settings sub-page. Every setting that needs to be exposed through the web interface must be manually added there. Since this application only has a single setting, it is this one setting that has been added to the Settings sub-page of the General group.
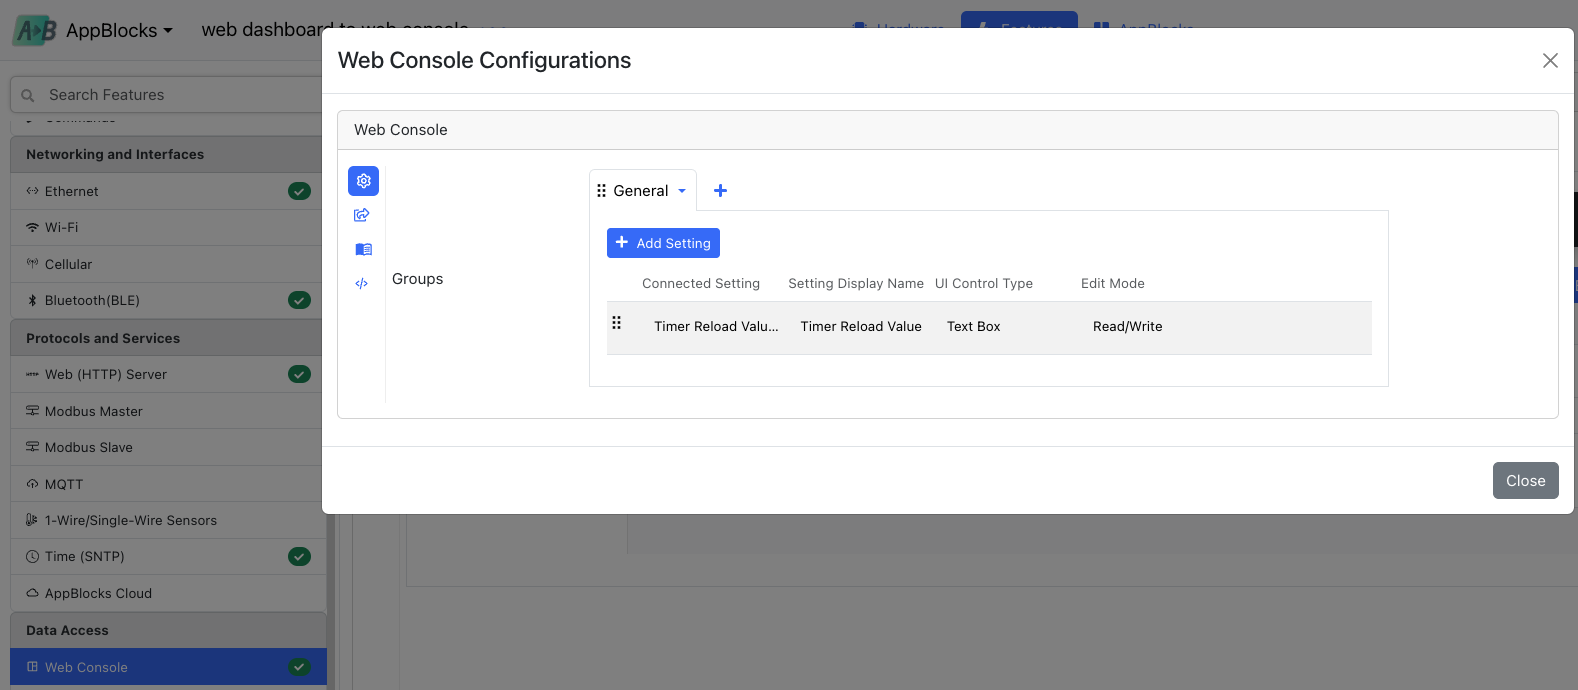
Once you add anything to the Web Dashboard, the Web (HTTP) Server is also automatically enabled.
Accessing the Web Interface of a Physical Kit (Device)
To access the web pages of your TPS, you will need to assign a valid IP address to it first. This is where the Ethernet page of the Features tab comes into play. The DHCP property is set to Enabled by default, so your TPS device will get a valid IP address from the DHCP server.
All right, but how will you know what this IP address is? The simplest way is to use the Device Explorer. You can open it by clicking this button, located in the bottom left corner of the tab:
Once there, click the IP address of "your" Kit (TPS device) and select Open Console or Open Console Here from the menu. The former opens your device's web interface in a new browser tab, while the latter opens it in a pop-up window within the current tab.
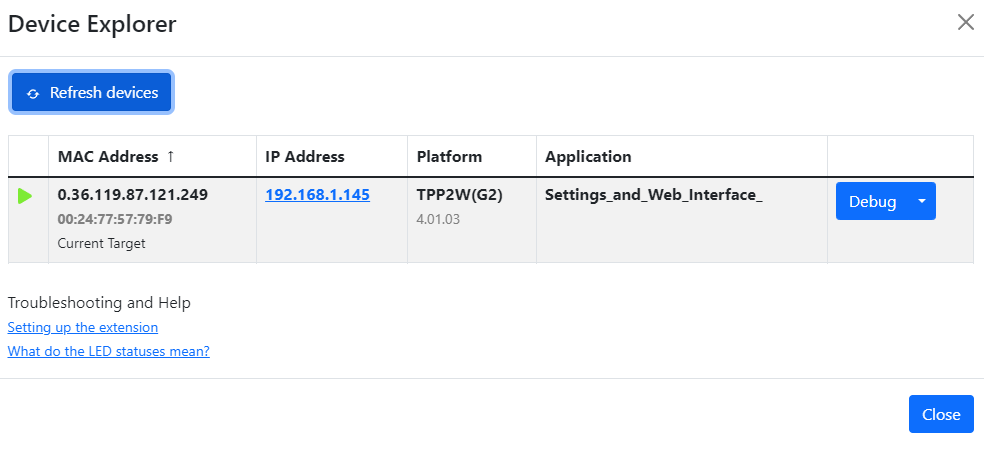
If you open the Device Explorer window too early, you may see the default IP. This is because DHCP takes a few seconds to work its magic. Ensure the application is running and click Refresh Devices to reveal the new IP address assigned by the DHCP server.
Here is how the web interface looks:
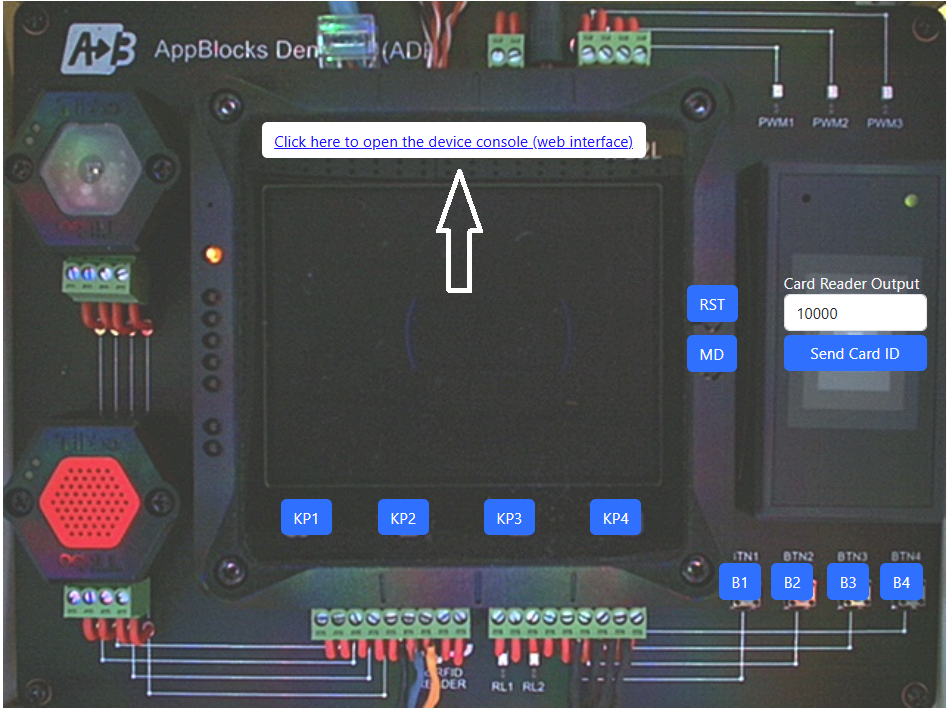
Accessing the Web Interface of a Cloud ADK
Since Cloud ADKs are not connected to your network, you can't open their consoles (web interfaces) directly. Instead, click this link -- it is displayed whenever an application has the Web Dashboard enabled:
Responding to Setting Value Changes
There is still one last trick to show you in this project: Responding to setting (variable) value changes. The On Variable Changed event block triggers every time the corresponding variable changes its value. In this application, changing the setting value will cause a debug message to be printed.
You can use the On Variable Changed block to report value changes for plain variables and settings but not for timers.