You already know that periodic actions can be implemented using Periodic Timers. For actions that must happen periodically but do not necessarily fit into a simple "every X seconds" pattern, the Scheduler may be used. Schedules are configured on the Scheduler page of the Features tab. The corresponding event block is called On Scheduled Event.
Scheduler configurations may be as simple as "do X every minute" or as sophisticated as "do X only on Mondays and Tuesdays of June, at 6 pm."
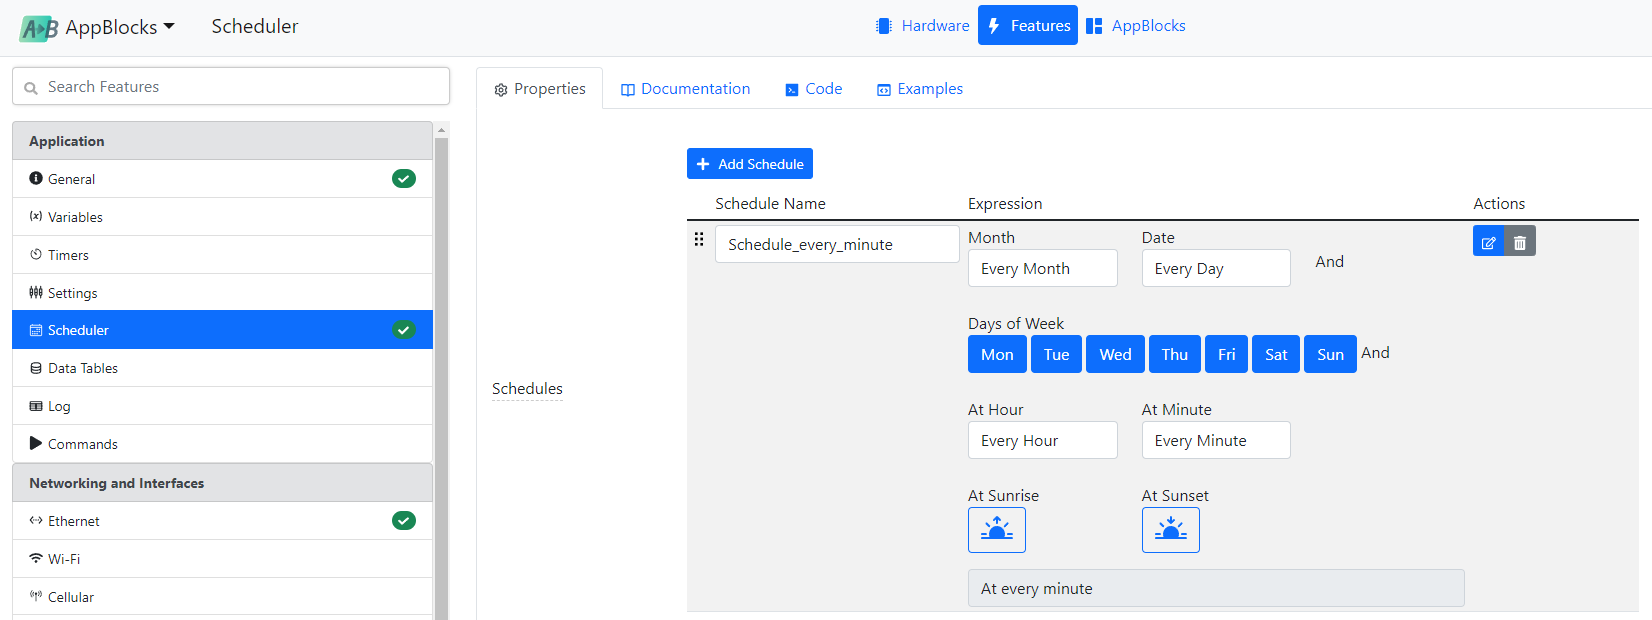
This project demonstrates the simplest example: Once a minute, the application will read the current date and time using the Get Current DateTime block (first use in this Tutorial), then Debug Print it into the console window.
At first, using the scheduler in such a simple project may seem unwarranted -- why not use a simple Periodic Timer instead? There is, however, a crucial difference here. The Periodic Timer may be set to execute something every minute, but you can't force it to trigger precisely on the minute.
Sometimes this doesn't matter, and then using a timer is OK. Other times, you'd want to trigger something as soon as the new minute starts! For example, this project prints the time as it progresses, so it is only natural that the time update would be synchronized with the clock.
Parameter Passing
There is an additional trick that you learn with this project -- parameter passing from one block to another. Look at the project's flowchart. The current time and date are obtained using Get Current DateTime. The date and time are then printed by the DebugPrint block. How did the date and time get from one block to another? There are no variable assignments here!
The answer is that the date and time are passed as a parameter. In situations where one block outputs a value, and then the next block has the ability to consume this value, direct parameter passing becomes possible. In this project's case, the parameter name is time_now. Click on the DebugPrint block to see this parameter specified in the printstring.

Adding schedules to your project automatically enables the SNTP protocol (see the SNTP page of the Features tab). This is because executing schedules requires the device to know the current date and time. This is where the time zone also comes into play for the first time. For your schedules to work correctly, configure the Time Zone property on the General page of the Features tab. Designing for a global audience? Link the Time Zone property to a setting, expose it through the web or LUIS interface, and let your users make the selection.