Let's consider another popular indoor agriculture system -- the lighting controller. Artificial lighting is a necessary attribute of many indoor growing facilities. Carefully tuned LED panels blast the "sunshine" at just the right wavelengths to promote healthy plant growth while economizing energy consumption.
Since the plants expect to "see" proper sunrise and sunset cycles, you can't just "flip a switch" and suddenly dose them with the full power of your LED lights. It is best to emulate the gradual sunrise, as it happens in the natural world. Similarly, you can't just "turn the sun off" in the "evening" -- there must be a proper "sunset," or your plants will get confused.
LED dimming is typically controlled through pulse-width modulation (PWM). Tibbo offers two PWM Tibbits -- #16 and #17; this project uses #16. The project also prints the PWM output levels to the console, so you can run it even if you are not using the AppBlocks Demo Kit (ADK) and do not have this Tibbit.
On the ADK, channel 1 of Tibbit #16 is connected to a red status LED marked "PWM1." The brightness of this LED depends on the duty cycle of the signal coming out of the PWM Tibbit.
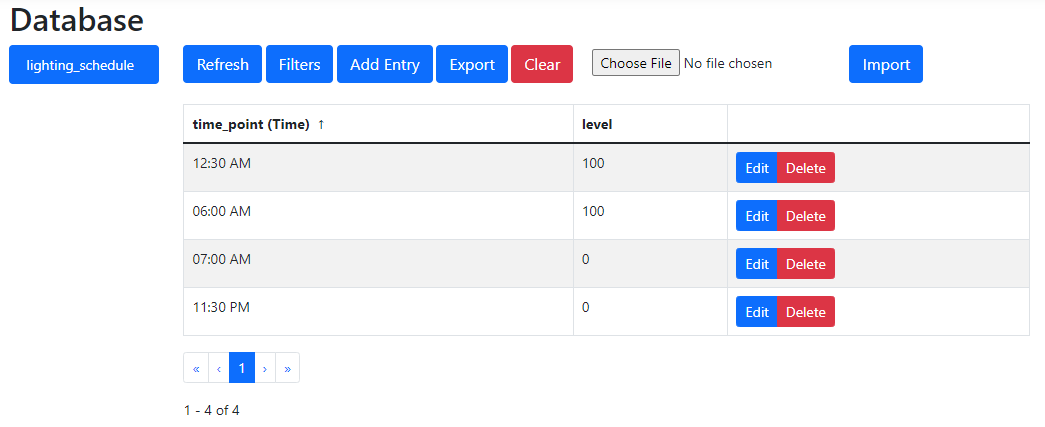
At the heart of the application is the data table called lighting_schedule. This table has two fields: time_point and level. Users define the key points in the current schedule, and the system gradually changes the light levels (interpolates) between these points. Let's illustrate this with an example.
Suppose you have the following schedule:
| time_point | level |
|---|---|
| 11:30 PM | 0 |
| 00:30 AM | 100 |
| 06:00 AM | 100 |
| 07:00 AM | 0 |
So, the "sunrise" is at 11:30 PM (not unusual for growrooms. as the electricity is cheaper at night). The sun is "fully up" by 30 minutes past midnight. The "sun" starts to "go down" at 06:00 AM, and by 07:00, it is dark. This cycle is illustrated by the following diagram:

The job of the application is to interpolate the light levels between the time points. For example, knowing that the LED brightness is 100% at 6 AM and 0% at 7 AM, the system should be able to determine, that the brightness at 6:30 AM equals 50%.
The simplified formula for calculating the "spot brightness" is as follows:

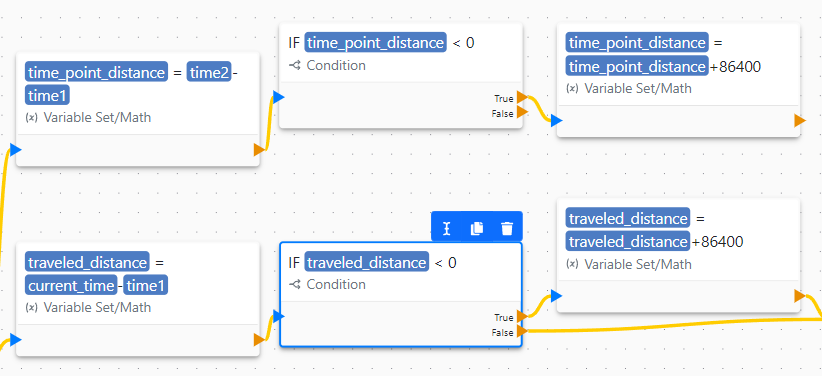
This simplified formula disregards the cyclical nature of the time-of-day value: The time "rolls over" between the first and the second records of the above data table. Meaning the time value of the second record is smaller than the time value of the first record, and this possibility is taken into account by the application. This is done in the following section of the flowchart:

In AppBlocks, all times are presented as the serialized number of seconds. For example, the time value for 2 AM is 2 60 60 = 7200. The value of 86400 is the total number of seconds in the day.
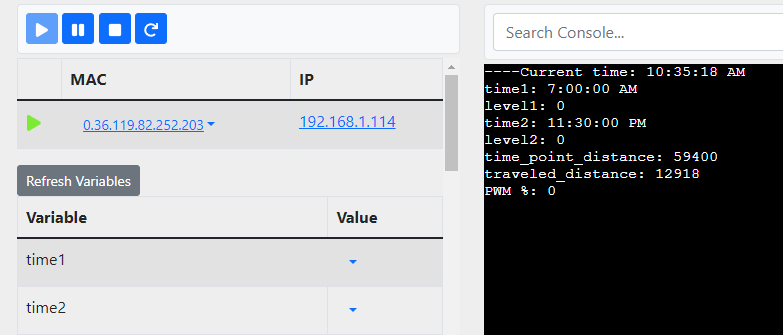
Now we are going to explain how the calculations are made. For illustration, let's assume that the current time is 06:30 AM.
At 5-second intervals, the application does the following:
- The current date and time are obtained and saved into the time_how variable (in this example, the present time is 06:30 AM).
- The first Table Lookup finds a record with a time point that is less or equal to the current time. This would be the third record. The time_point and the level values from this record are saved into the time1 and level1 variables.
- The second Table Lookup finds a record with a time point greater than the current time. This would be the fourth record. The time_point and the level values from this record are saved into the time2 and level2 variables.
- The time_point_distance variable is then set to the distance, in seconds, between time1 and time2. This is done with the "time rollover" check and, if needed, the value correction.
- The traveled_distance variable is then set to the distance between time1 and the current_time. Once more, this is done with the "time rollover" check and, if needed, the value correction.
- Finally, the PWM level is calculated.
When searching within the lighting_schedule table, the system knows that the records must first be sorted in ascending order of times. The above example will work even if your data table has a different (and random) order of times. The time-ordered list of records for the above example is as follows:
| time_point | level |
|---|---|
| 00:30 AM | 100 |
| 06:00 AM | 100 |
| 07:00 AM | 0 |
| 11:30 PM | 0 |
After the internal sorting of the records, the system will conduct the search in the correct direction. For the first Table Lookup block, which searches for the record with a time less or equal to the given time, the system will search in the descending order of time_point values. For the second Table Lookup block, which searches for the record with a time greater than the given time, the system will search in the ascending order of time_point values.
Further, for the first time in this Tutorial, the Wrap Around parameter of the Table Lookup block is set to Enabled for both lookup blocks. This is because the next or previous record the system is looking for might be on the other end of the table! For example, when the current time is 00:15 AM, and the first Table Lookup block needs to locate the record with the time that is less or equal to the present time, the target record is the "11:30 PM" record! The search will need to "wrap around" to find this record.
Well folks, there you have it, a complete PWM control solution for your growroom, implemented in just 25 blocks. Of this block count, 8 are Debug Print blocks and can be dropped, meaning that the entire application only took 17 blocks to build! The next topic shows how this count could be reduced even further.

