Welcome to your first AppBlocks lesson. Naturally, this is the "Hello, World" of AppBlocks.
Each AppBlocks project is presented on three tabs -- Hardware, Features, and AppBlocks.
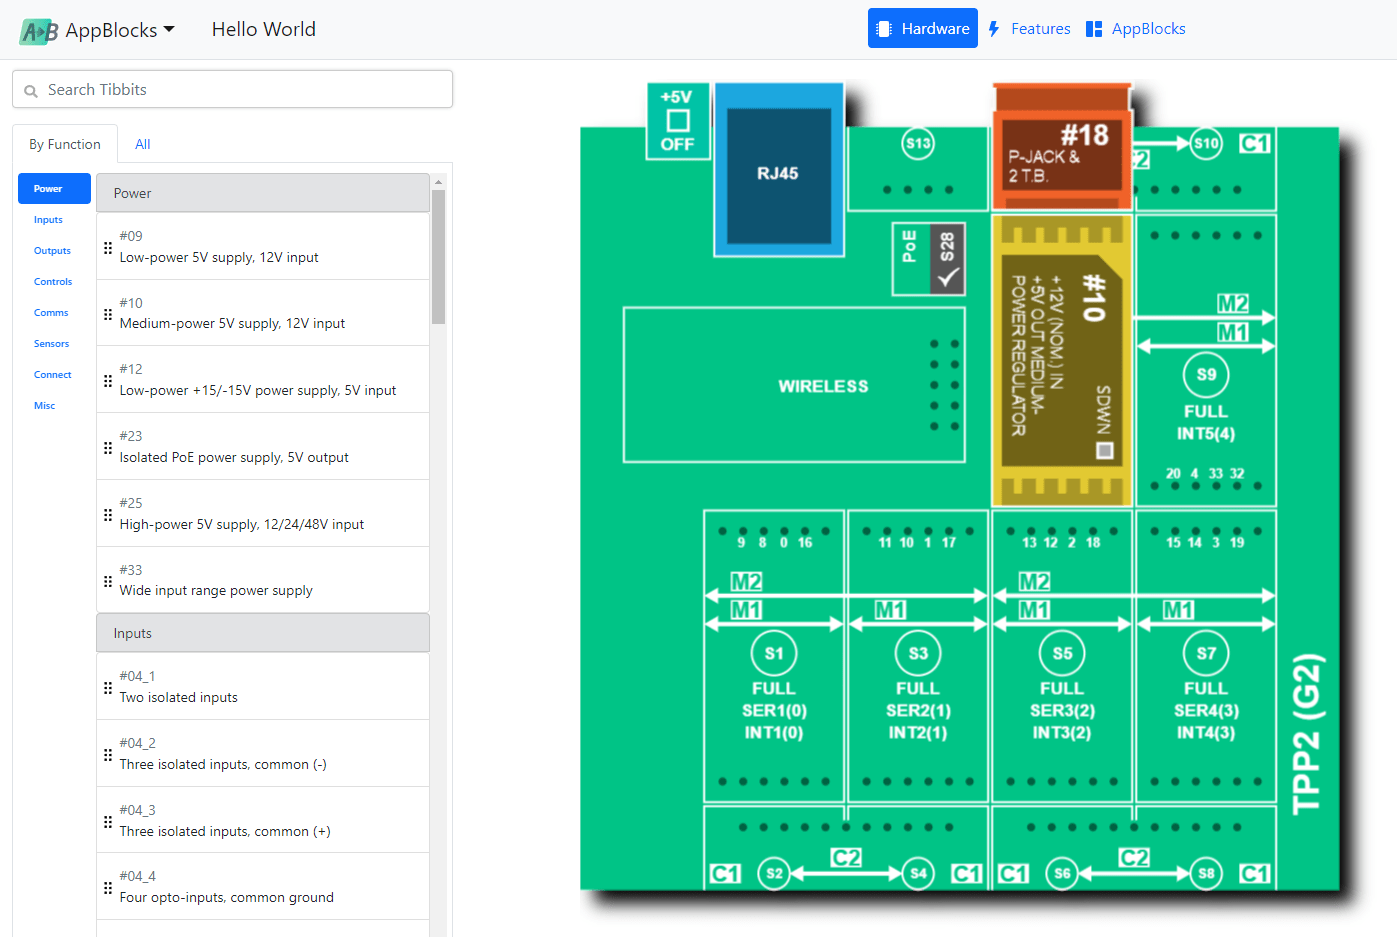
The TPS configuration is defined in the Hardware Tab. To add Tibbits to the configuration, drag them onto the desired socket or click the socket and select from the list of compatible Tibbits. This simple project will need only a power supply and a power jack Tibbits.
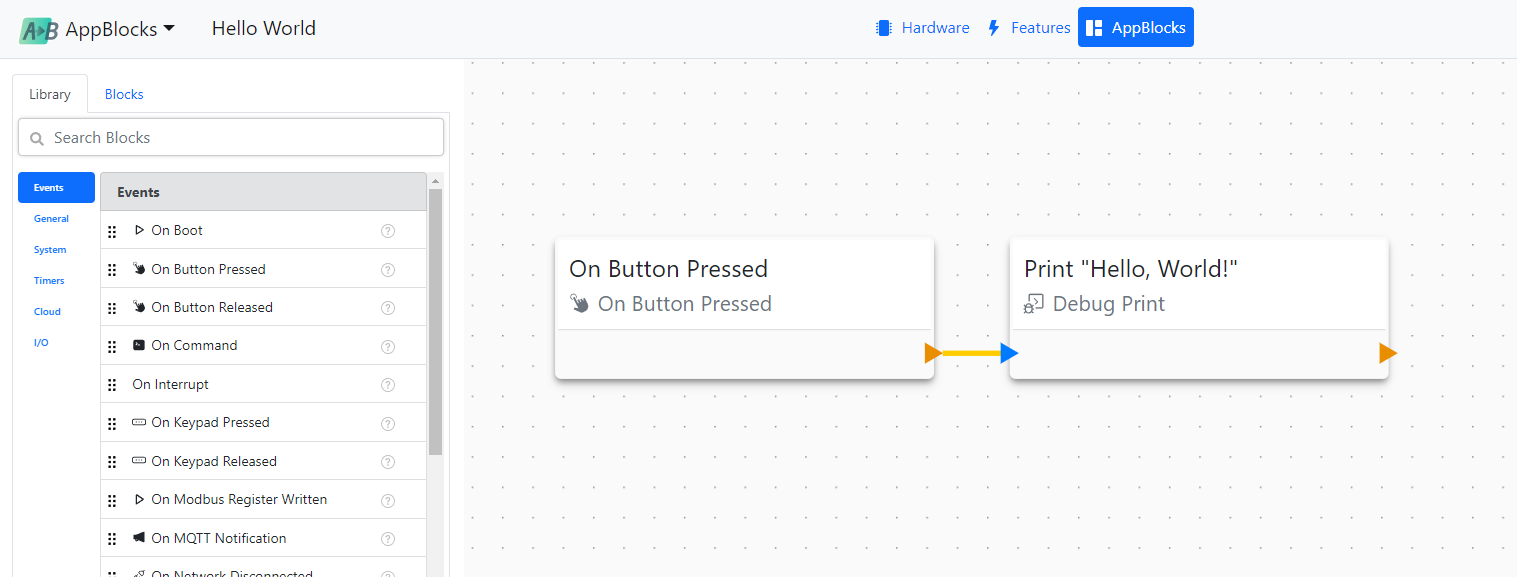
The AppBlocks tab shows the application flow as a block diagram. Blocks are added by dragging them from the left panel onto the application canvas. The flows proceed left-to-right and always start with an event block, in this case, the On Button Pressed event.
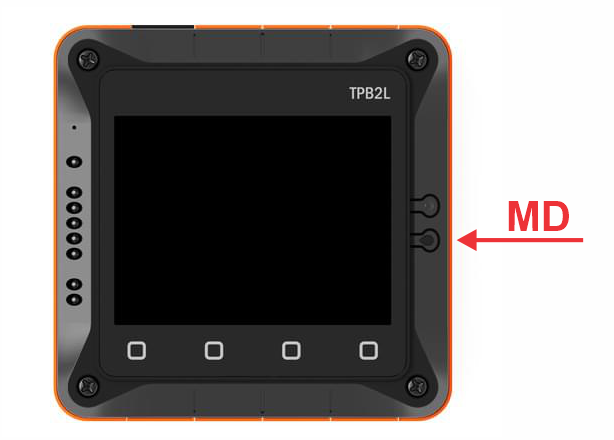
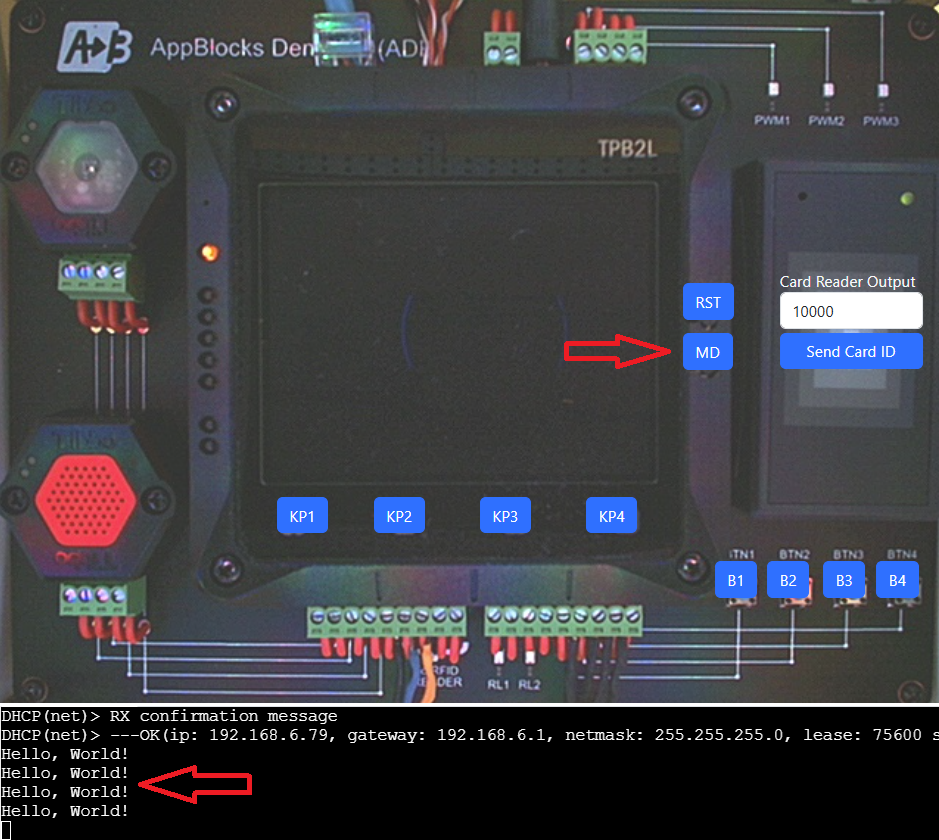
The "button" that triggers the On Button Pressed event block is the MD button of your TPS device. Here is where the button is (and the button above it is Reset):
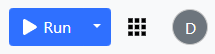
To run the application in debug mode, click the Run button at the top right corner of the screen:
In debug mode, your application executes under AppBlocks' supervision. There is also a release mode (often called the "production mode") in which the device runs unattended. You can only run the "Hello, World" application in the debug mode because it uses the Debug Print block. Messages generated with Debug Print are shown in the Debug Panel, which is only available in the debug mode.
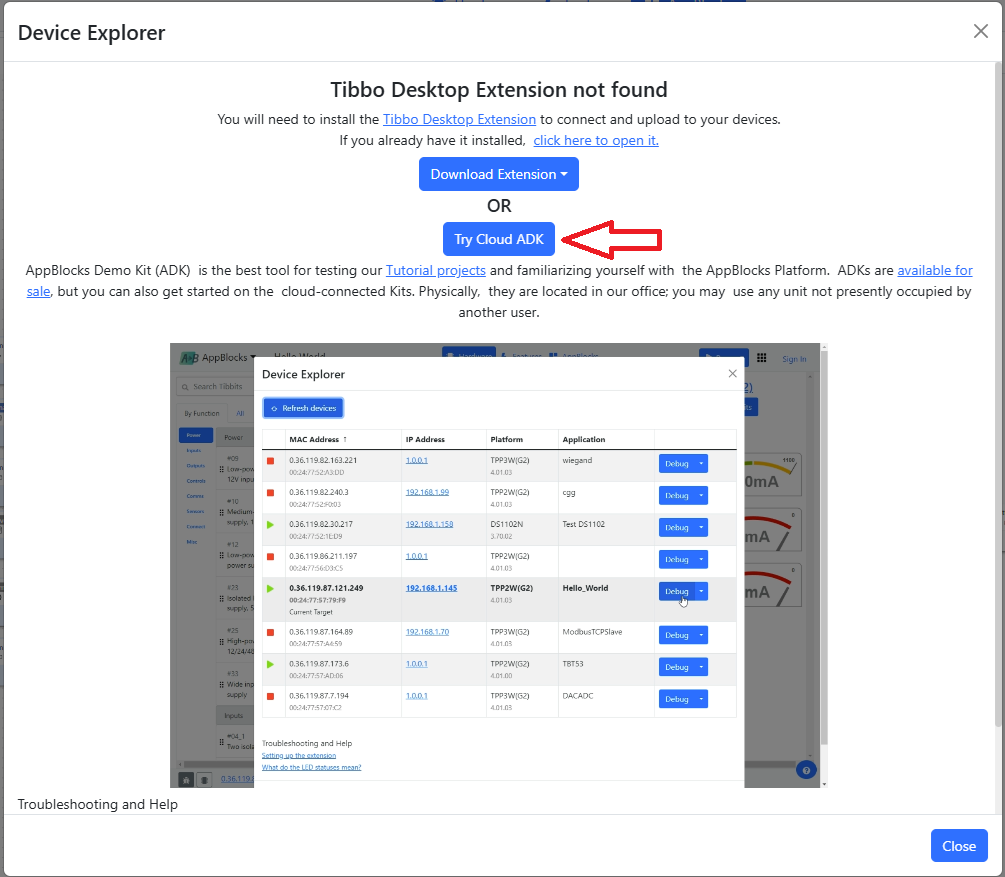
As soon as you click Run, a Device Explorer dialog will open. You have two choices here: run the project on a Cloud ADK or your own Kit (TPS device). The latter is only possible if you have a physical ADK (TPS device) and are working on a PC/Mac. Cloud Kits can also be used from tablets (and even smartphones, although their small screens detract from the experience).
Running on a Cloud ADK
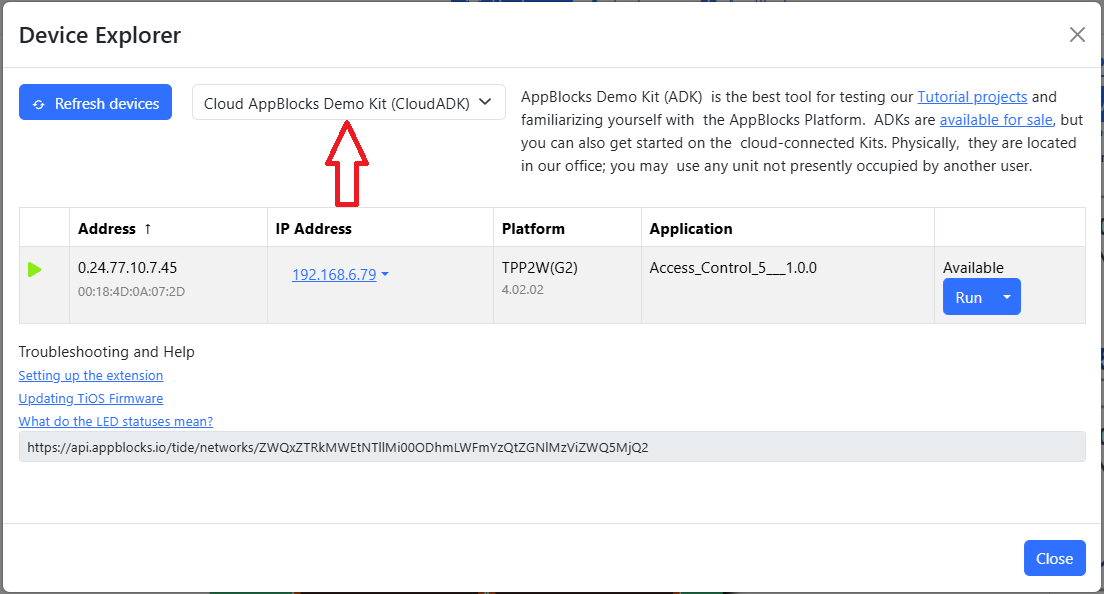
Depending on the dialog you are presented, click Try Cloud ADK or select Cloud AppBlocks Demo Kit (Cloud ADK) from the dropdown.
Cloud ADKs are real Kits running in our lab. We have connected them to the cloud and enhanced them with circuitry, allowing you to "push" the buttons remotely and emulate other inputs. Each Cloud ADK is also equipped with a front-facing camera, enabling you to observe the Kit's LCD and LEDs.
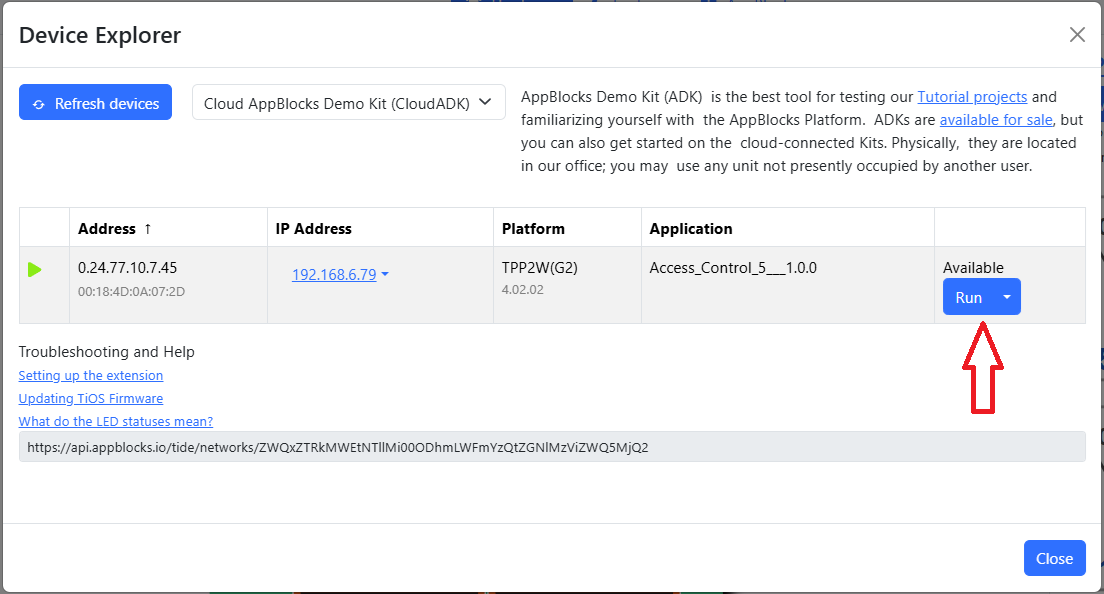
To Run your project on a Cloud ADK, click Run for any Cloud ADK marked Available.
The project will then be compiled and uploaded to the selected Cloud Kit and the Cloud ADK tab will appear. Click the MD button, and the "Hello, World" message will appear in the debug console.
Note: Since each Cloud Kit is a shared resource, we limit the duration of each Cloud ADK session.
Running on a Physical ADK (or Another TPS Device)
If you have already obtained an ADK (or have a TPS device), connect it to your LAN (the same one your notebook is connected to) and select Local Network from the dropdown at the top of the dialog. At this point, you will most probably see this:
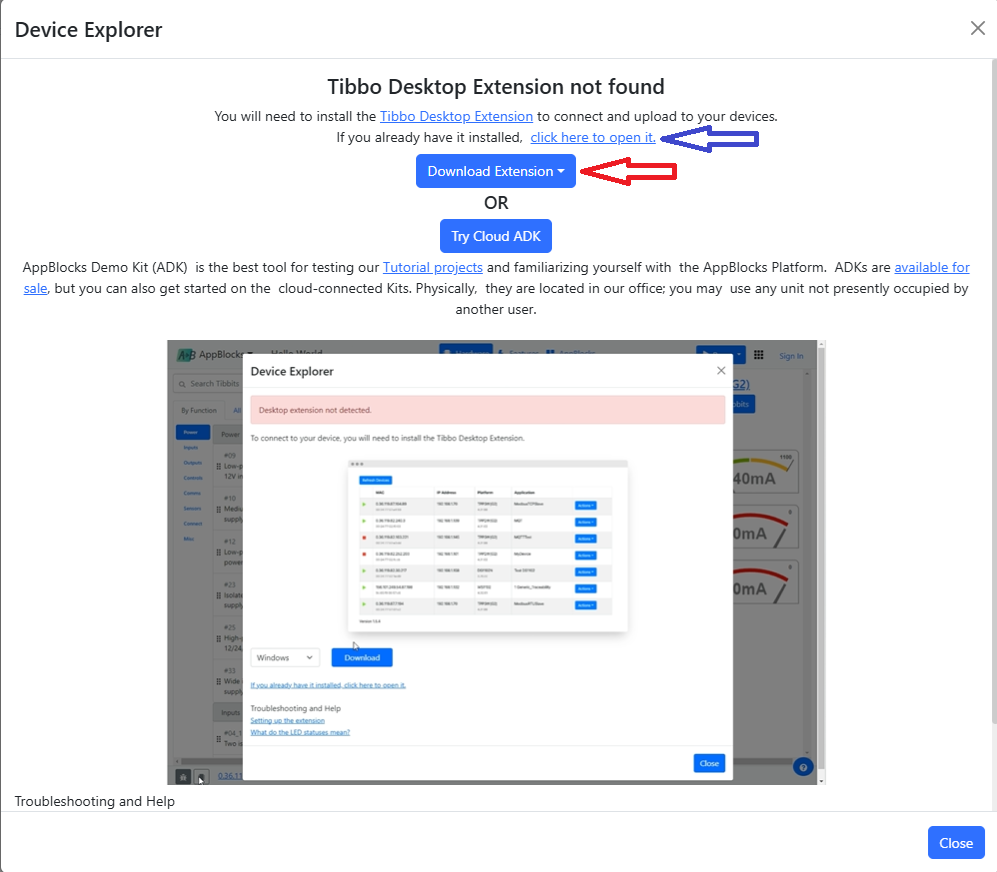
Device discovery is performed by Tibbo Desktop Extension, a small executable file that needs to be installed on your PC. Click Download Extension or open the existing one if you had it installed before.
Important: Do not close the extension; allow it to run in the background.
Once the extension runs, you will see the list of Tibbo devices found on your LAN. Find the line corresponding to your ADK (Tibbo device) and click Run. The project will be compiled and uploaded to the selected device.
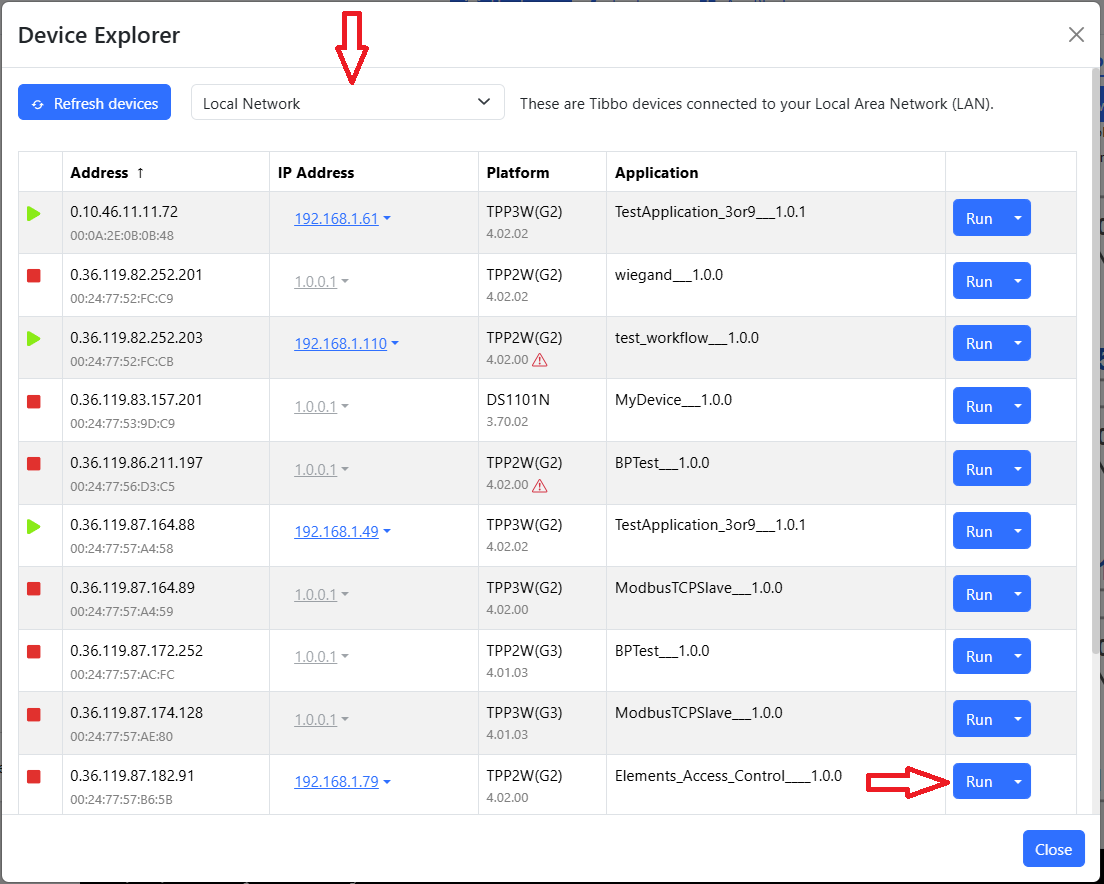
Now, press the MD button on your TPS.
This will send the "Hello, World" message to the debug console:

Congratulations, you've just completed your first AppBlocks lesson!