As we all know, there are two things that are absolutely necessary to keep plants alive: water and light. This article is pretty short, but feel free to jump straight to the demo.
We want to create a system that can autonomously keep our green friends alive, and as such, we require the following features:
These two features are the bare minimum for a smart indoor farming solution, but many other capabilities can be added to the system, such as:
- Temperature, Humidity, and CO2 monitoring: to monitor water levels in the air surrounding the plants.
- Leak detection and water level sensing to monitor water sources (a tank, a well, a container, etc.)W
- Soil humidity to monitor the soil's state
- Access control, ingress monitoring, and intrusion detection to keep bad actors away.
- Nutrient supply control: to provide fertilizer for the plants.
System overview
The following is a simple diagram of how the TPS will control different components to provide our plant with the light and water it needs.

Hardware
Requirements
We need a pump, a tank, and grow lights for this system.
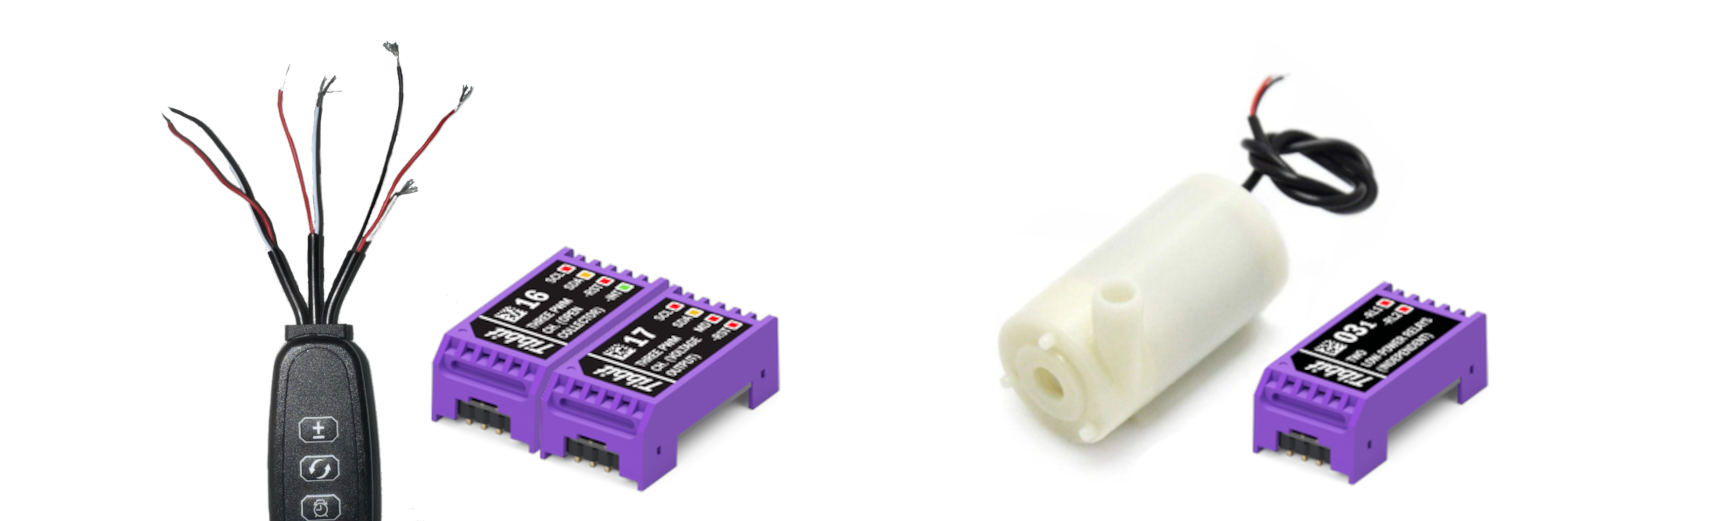
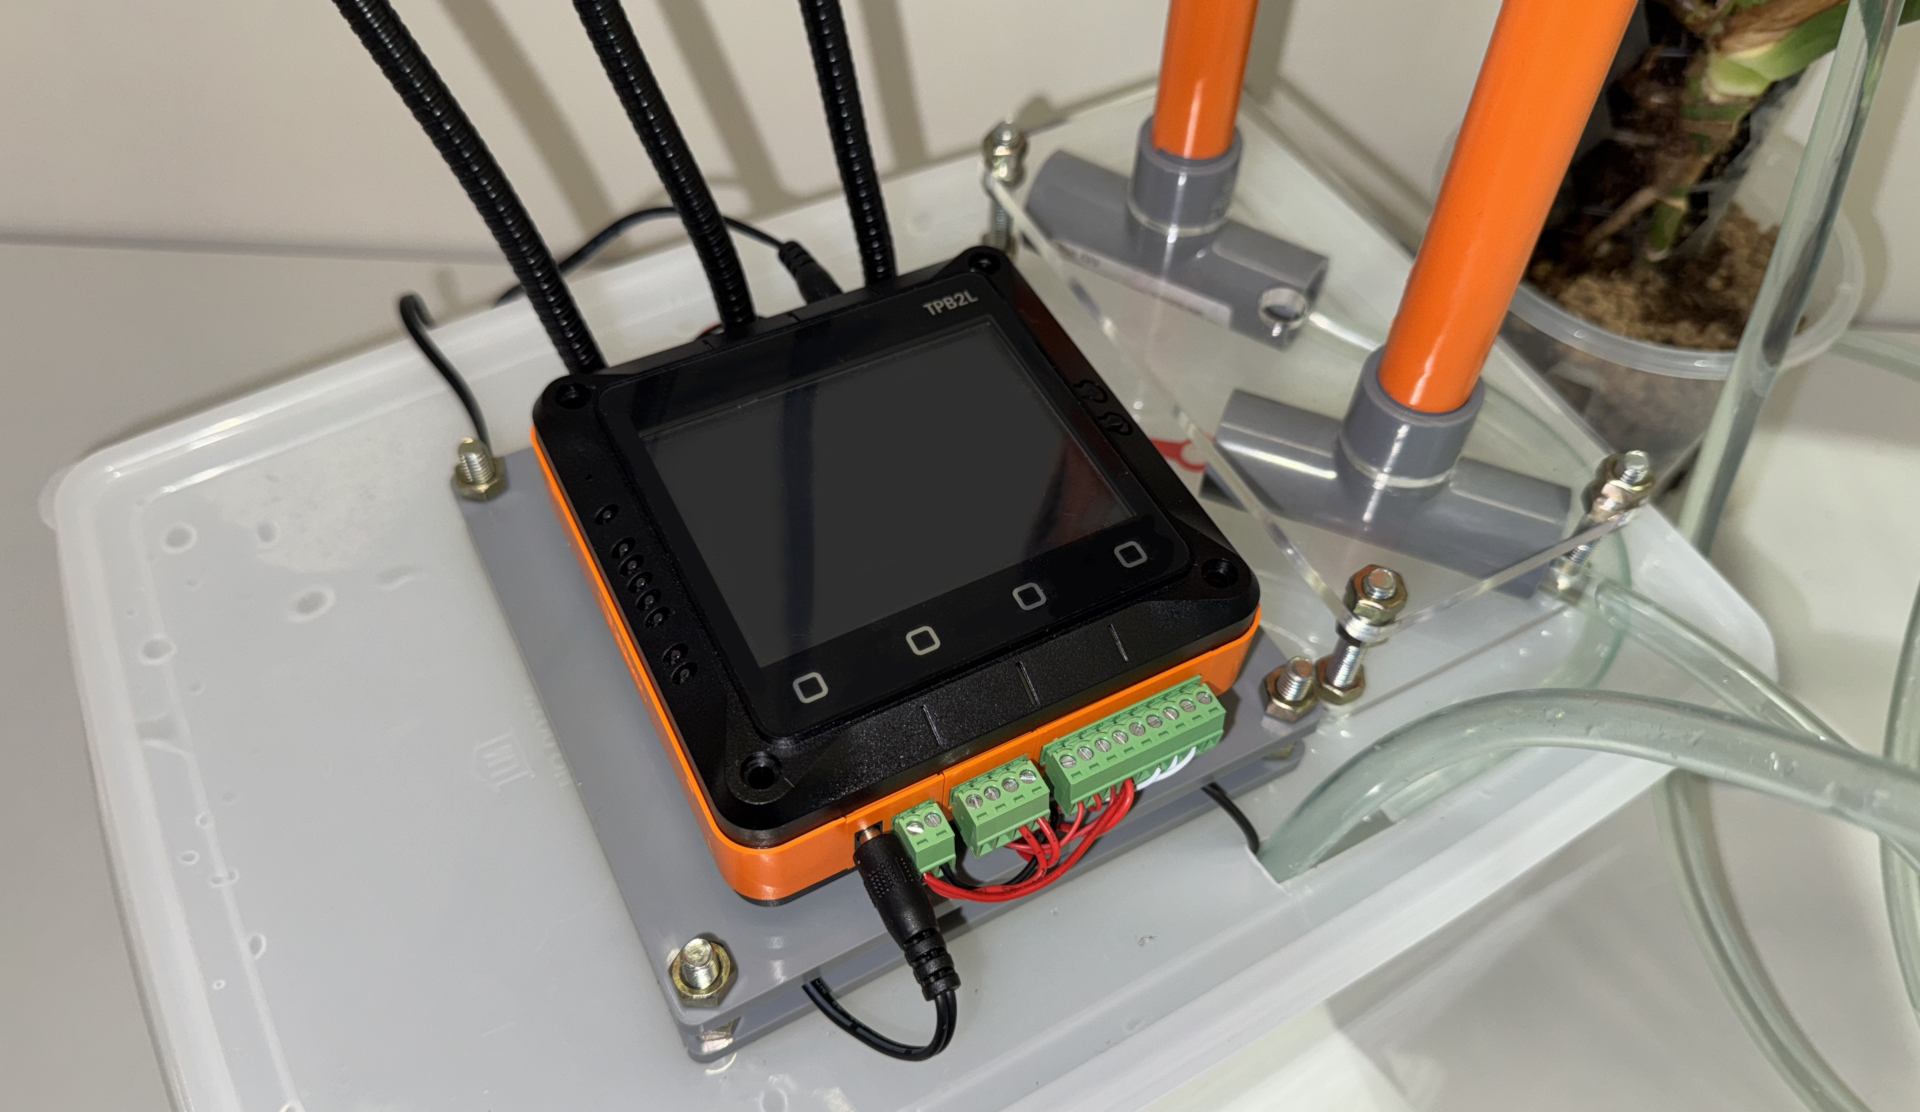
The grow light we used is similar to this one. The original lamp had a manually operated switch on the cable, but we took it out to control the lights directly through the TPS using the #16 and #17 Tibbits (PWM open collectors and PWM outputs).
To water the plant, we used a cheap, small submersible pump (similar to this), mostly used for small fish tanks and aquariums. However, for a professional application, you should retrofit an industrial pump.
To provide water for the pump, we used an off-the-shelf container with a soft, plastic lid.
Retrofitting
Part of the challenge in this project (and most industrial solutions) is to be creative and work around existing parts, so we inspected the lights and wired them up to the TPS.
Wiring
Have a look at the following schematic to see how the TPS should be wired to the system's peripherals.
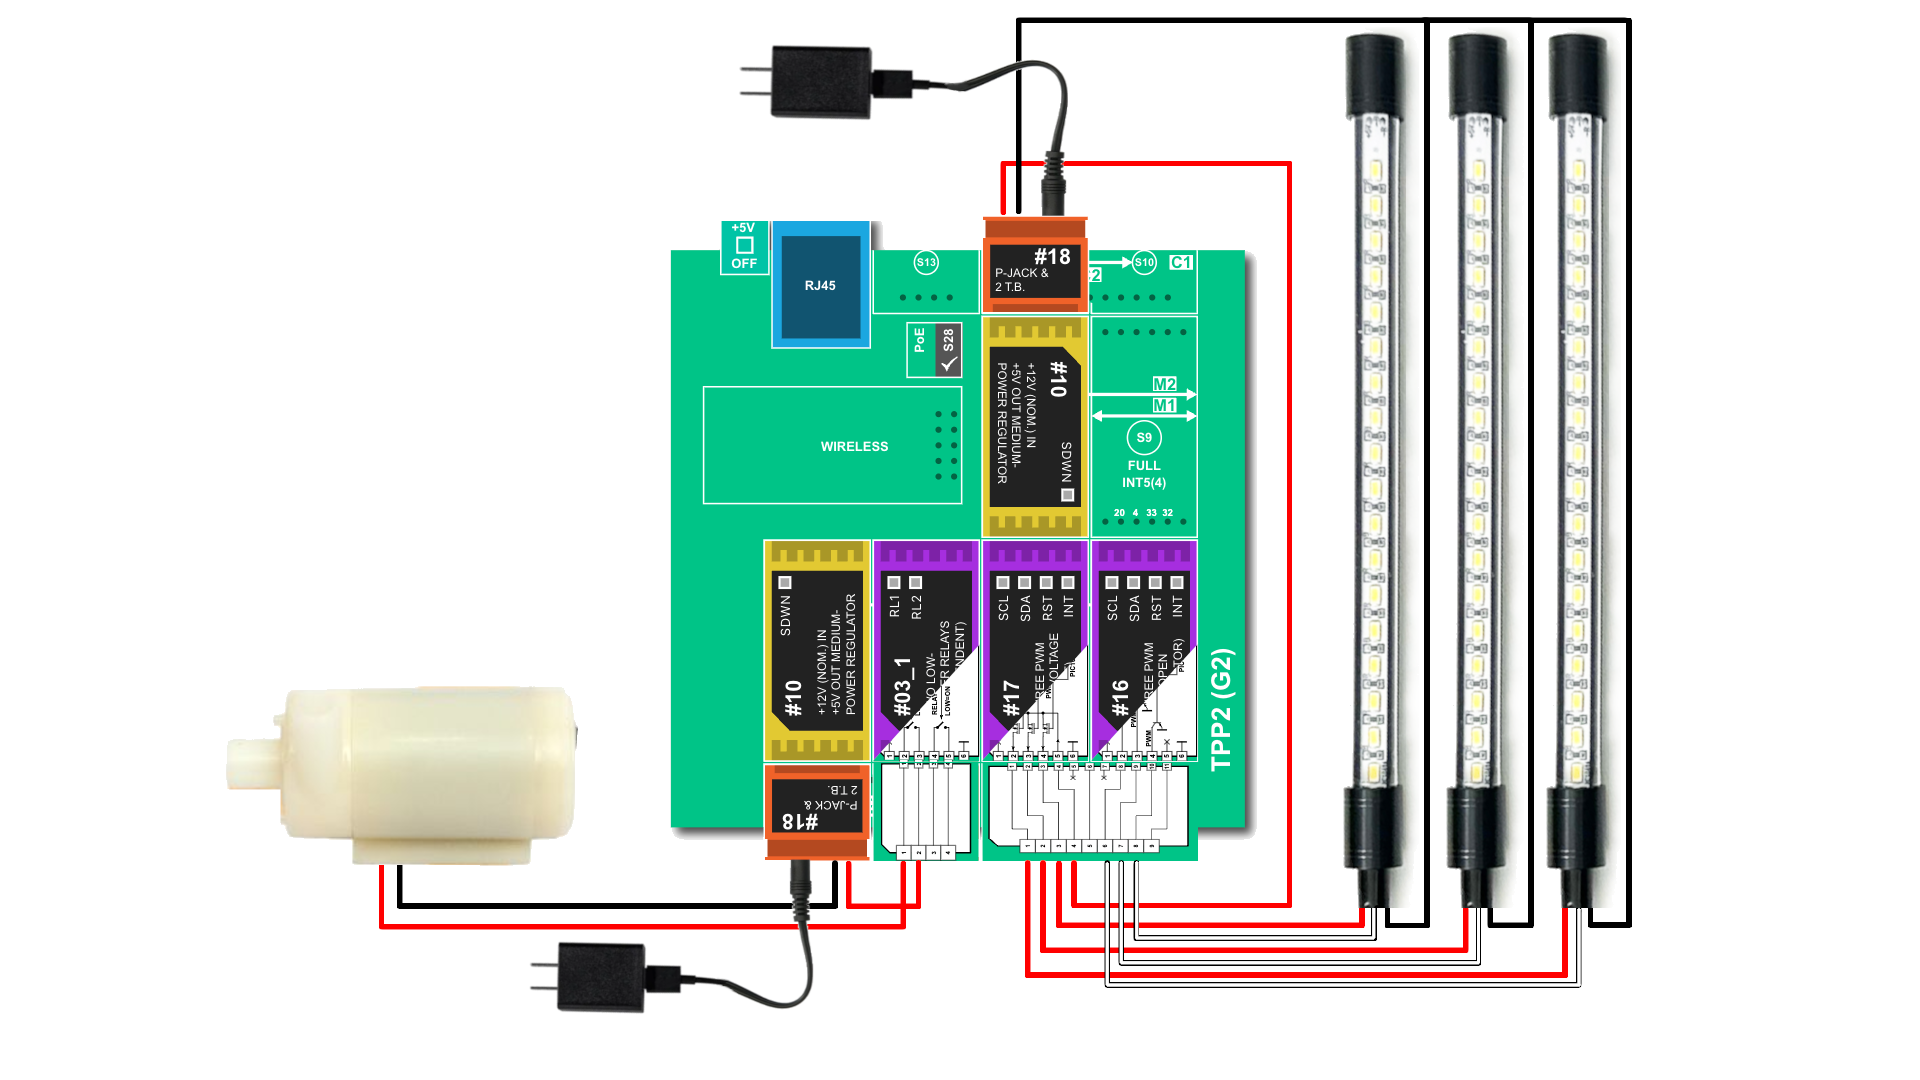
While we used two #10 Tibbits (we have a lot of spare 1A wall adapters lying around), Tibbit #25 or Tibbit #33 + a high current adapter are a better choice due to the high energy requirements of the grow lights. Additionally, an external power source can (and should) be used for the pump.
Logic
Now that our hardware is wired up, we will review the controller's logic.
Fundamentals
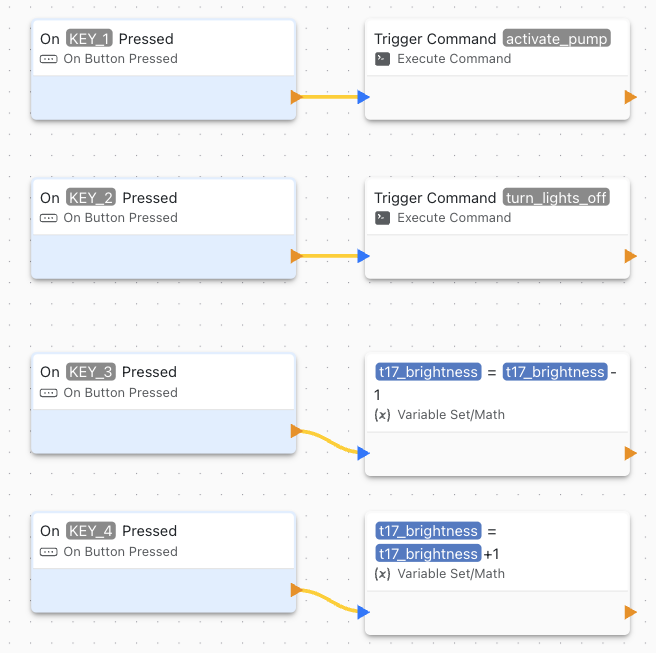
There are three main actions that our system should be able to do:
- Activate the water pump
- Turn the lights ON
- Turn the lights OFF
Check them out in the image below!

The image above has a new block called "Delay". This block is used to "queue" the execution of a second block. In other words, it means that "t" seconds after the first block is executed, the second block will be executed.
Manual control
For convenience (and testing), we will add some button actions.
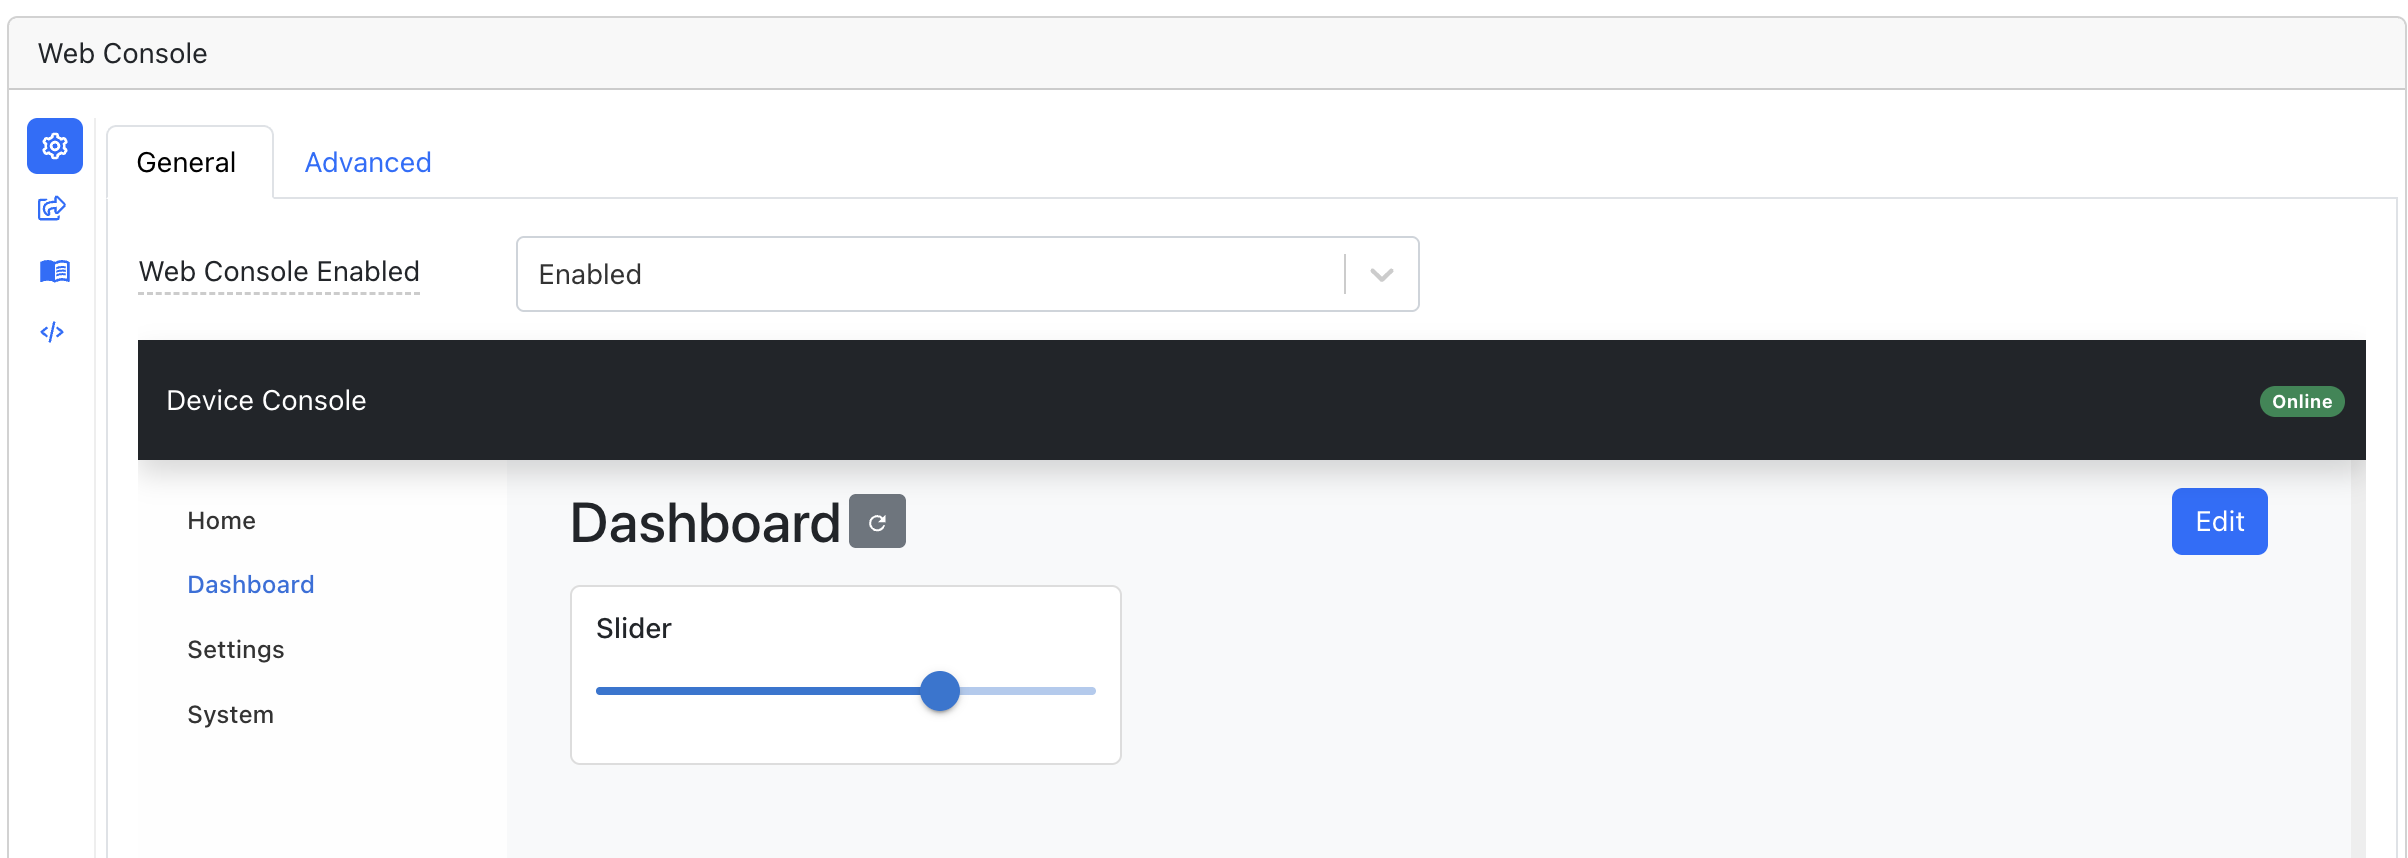
We will also add a slider on the web console to conveniently adjust brightness on the go.
Schedule control
Now, to make the irrigation and lighting extra hands-off, we can create schedules for each action using the "On Scheduled Event" block.
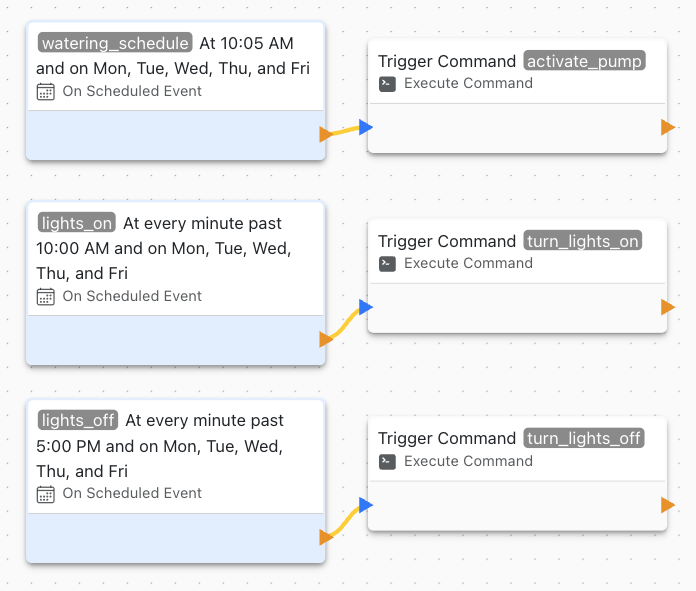
For more information on schedules, check this tutorial, this other tutorial, the block documentation, and the feature documentation.
Demo
Here's a video of the actual system at work (plus some pictures).

Next Steps
Many valuable features can still be added to this system, and we have a lot of learning materials:
- Temperature sensors
- Humidity sensors
- CO2 sensors
- Leak detection
- Water level monitoring
- Soil humidity sensors
- Access control systems
- Ingress monitoring
- Nutrient supply control
- Display information about the plant's health, the list goes on...