Settings
Settings are values your application keeps in non-volatile memory. They survive reboots and power loss, so use them for anything that is configured once per device or per site: setpoints, calibration offsets, IP addresses, passwords, schedules and names.
Settings separate configuration from logic. The same application can run on a hundred devices, each with its own setpoint, without you changing a single block.
Every setting has three sides:
- Storage. The value is kept in the device's EEPROM or flash disk and loaded at boot.
- A variable. Each setting automatically gets a variable with the same name. Blocks read and write the setting through that variable.
- A user interface (optional). You can expose a setting in the Web Console, LUIS, DS Manager or an LCD menu, so people can change it without reprogramming the device.
Where to find settings
Open the Features step and select Settings in the Data & Storage category.
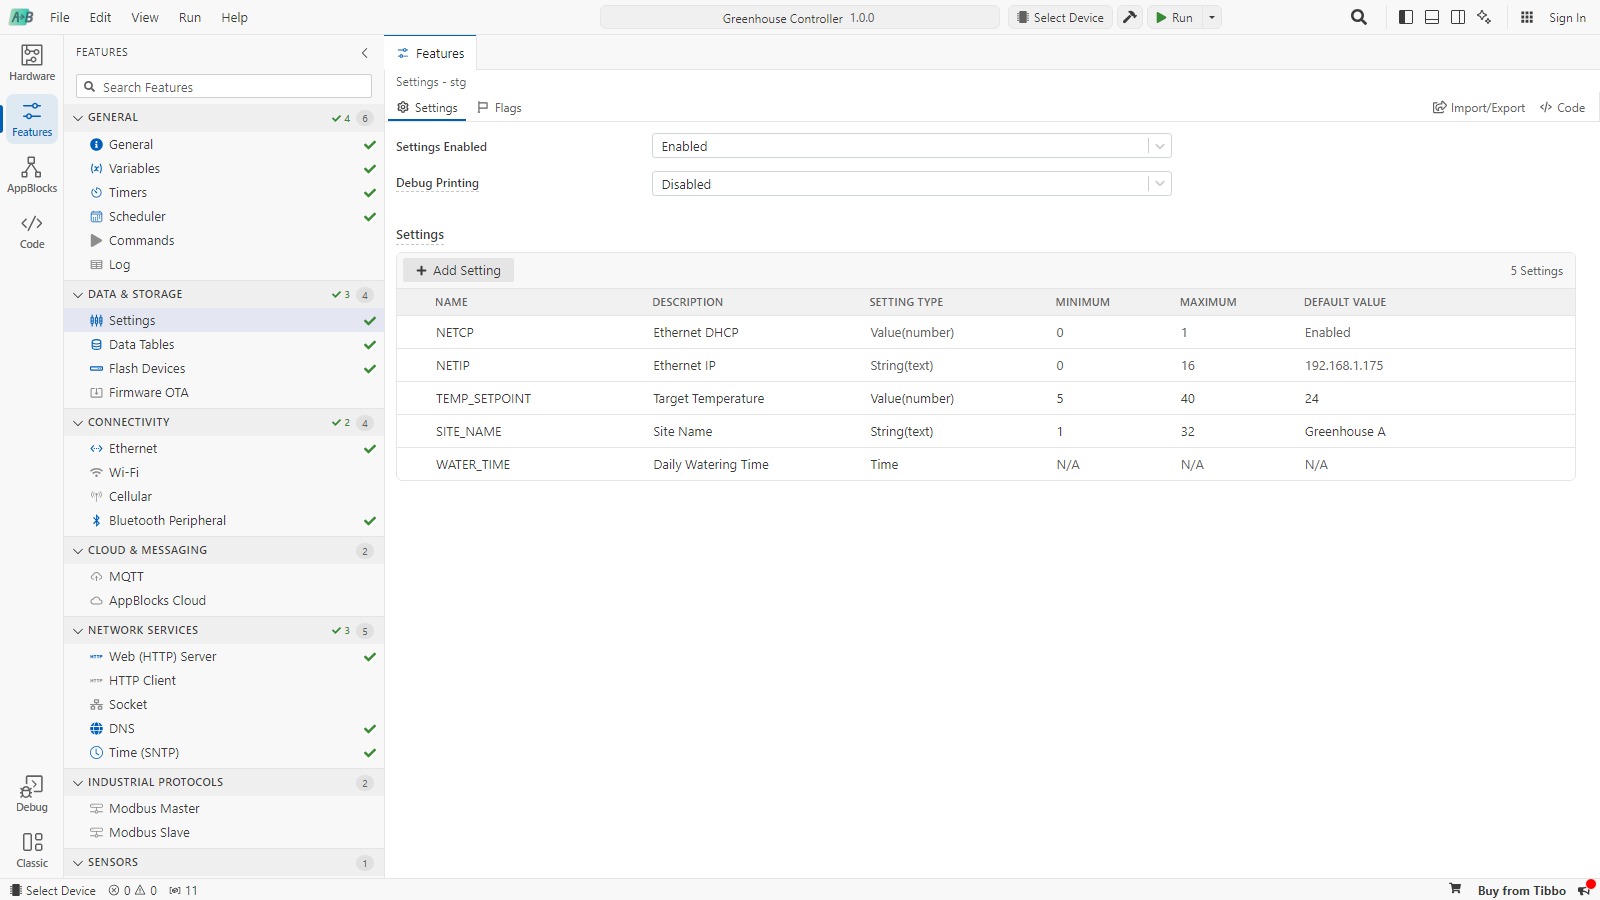
The page has two options and the list of settings:
| Option | Description |
|---|---|
| Settings Enabled | Includes the settings library in the application. It is turned on automatically when you add a setting or when another feature needs settings. |
| Debug Printing | Prints the new value of a setting whenever it changes. Messages go to the output selected in General › Debug Print Output. |
Creating a setting
- Click Add Setting. A new setting named
stg1is added and opened in its own editor tab. - Give it a Name. This is the setting's ID and also the name of its variable, so choose something you are happy to see in your blocks, such as
TEMP_SETPOINT. - Enter a Description. Dashboards use it as the label users see, for example Target Temperature.
- Choose the Setting Type and fill in the limits and the default value.
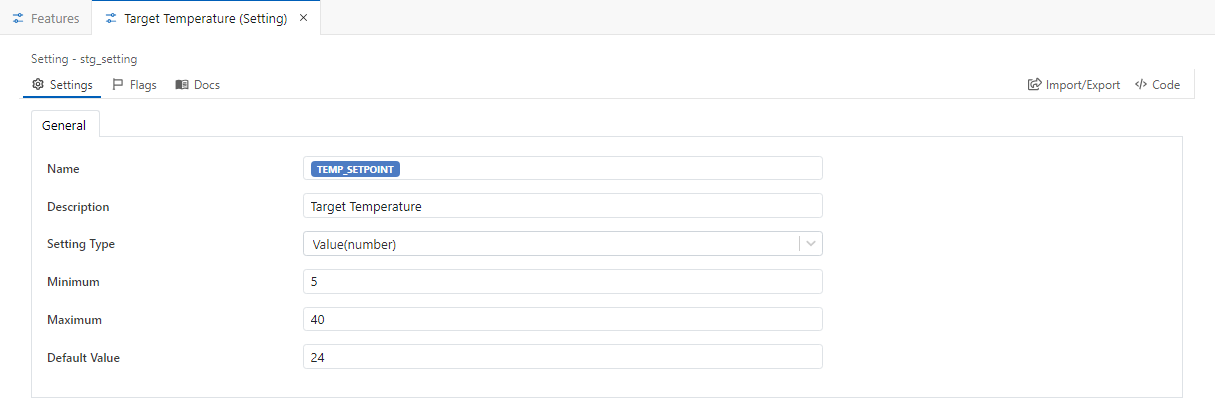
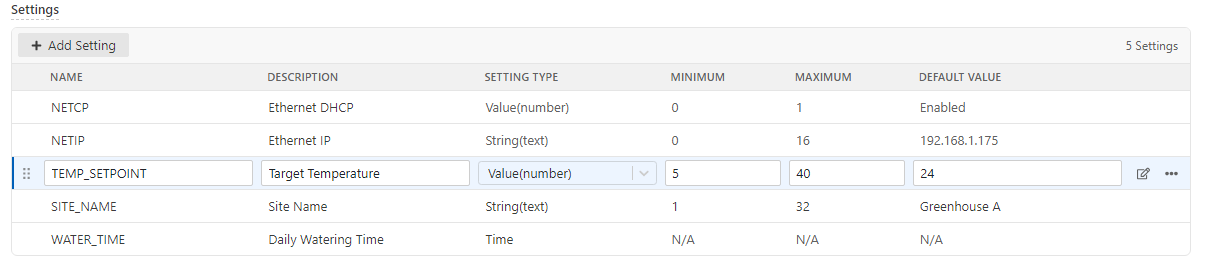
For quick changes you don't need to open the editor. Click a row in the list to edit it in place, then use the pencil icon to open the full editor or ⋯ to duplicate or delete the setting. Drag a row by its handle to reorder the list.
Setting properties
| Property | Description |
|---|---|
| Name | The setting's ID, its storage key and the name of its variable. 2 to 32 characters, must start with a letter, and must be unique in the project. Keywords of the target language are not allowed. |
| Description | The human-readable name. It is shown in dashboards and copied to the variable's description. |
| Setting Type | The kind of value. See Setting types. |
| Minimum / Maximum | For numbers, the allowed range. For text, the minimum and maximum length (the labels change to Minimum Length and Maximum Length). Not used for Date Time and Time. |
| Default Value | The value the device uses before anything has been saved, and the value restored by Initialize Settings. Must be within the limits. |
Setting types
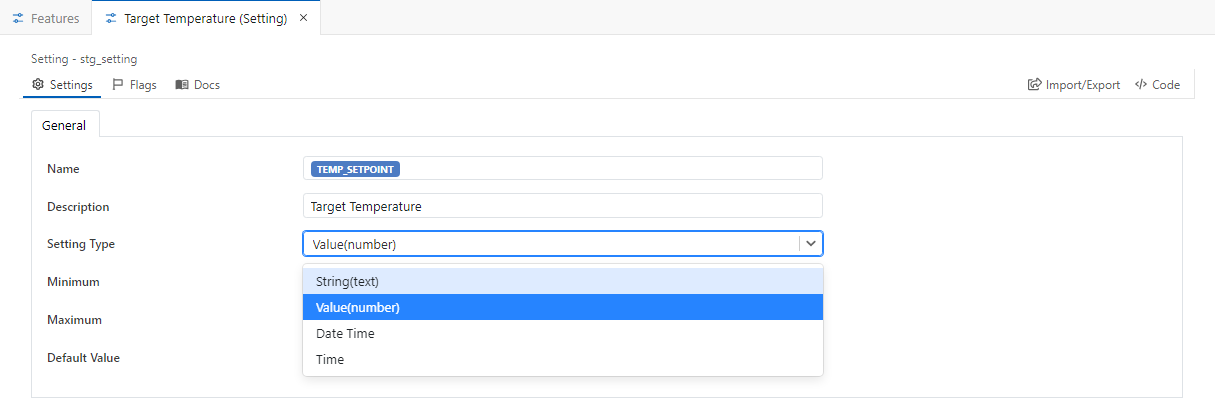
| Type | Stores | Limits mean |
|---|---|---|
| String(text) | Text, such as a site name, a URL or an IP address. | Length in characters. The maximum also sets how much storage the setting reserves, so keep it realistic. The largest allowed value is 240. |
| Value(number) | A number, integer or decimal. | The allowed range. |
| Date Time | A date and time, stored as a Unix timestamp (seconds since 1970-01-01 UTC). | Not used. |
| Time | A time of day, stored as seconds since midnight. | Not used. |
The setting's variable
As soon as you add a setting, AppBlocks creates a variable with the same name. You'll find it in Features › Variables under Auto-Generated Variables, and in the Variables panel under Linked.
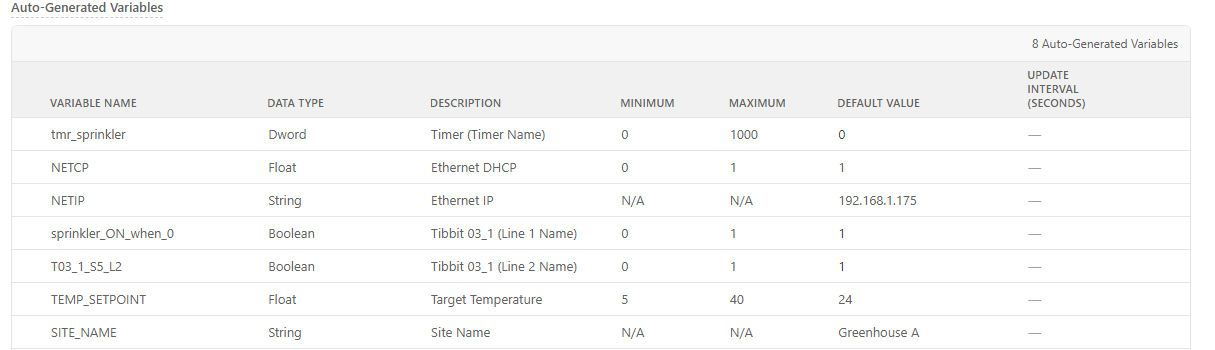
The variable is read-only in the editor. Its name, type, limits and default always follow the setting, and it is removed when you delete the setting. What you can do with it is everything you can do with any variable:
- Insert it into any block parameter, for example in a comparison or a message. Pick it from the parameter's dropdown and it appears as a blue tag.
- Change it with Variable Set/Math. The new value is saved to non-volatile memory.
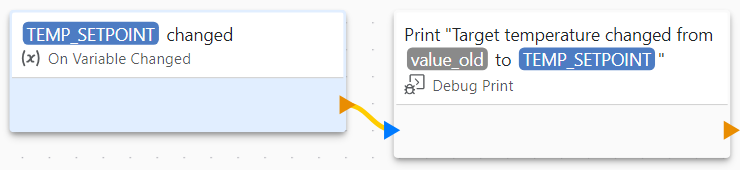
- React to it with On Variable Changed. The event fires whenever the value changes, whether a block, the Web Console, LUIS or DS Manager changed it.
This flow prints a message whenever the target temperature changes. value_old is the previous value, provided by the On Variable Changed block:
EEPROM and flash memory wear out after a limited number of write cycles. Every write to a setting's variable is a write to non-volatile memory, so don't use a setting as a counter or update it from a fast timer. Keep frequently changing values in a regular variable and copy them to a setting only when needed.
What happens at boot
When the device starts, it loads each setting's stored value into its variable before your application logic runs. The On Variable Changed event does not fire for this initial load.
- First boot: nothing has been stored yet, so every setting starts at its Default Value.
- Storage invalid or corrupt: the device restores the default values and continues. On TiOS it prints Settings initialization failed, restoring default values.
- MicroPython: if you change the type or limits of any setting and upload the application, all settings are restored to their defaults.
Where the values are stored depends on the runtime:
| Runtime | Storage |
|---|---|
| TiOS | EEPROM. All settings together can occupy at most 2040 bytes: each text setting takes its Maximum length (255 if blank) and every other setting takes 4 bytes. The editor reports an error when you exceed the limit. |
| Zephyr | The flash disk (/lfs/settings.dat). The Flash Disk feature is enabled automatically. |
| MicroPython | settings.json on the device file system. |
Restoring defaults
To reset every setting to its Default Value:
- Use the Initialize Settings block in your logic, for example behind a "factory reset" command or a long button press.
- Click Initialize Settings on the System page of the Web Console.

Linking feature properties to settings
Many feature properties, such as the device name, IP address, Wi-Fi password or MQTT server, can take their value from a setting instead of a fixed value. Properties that support this show a Link to setting button.
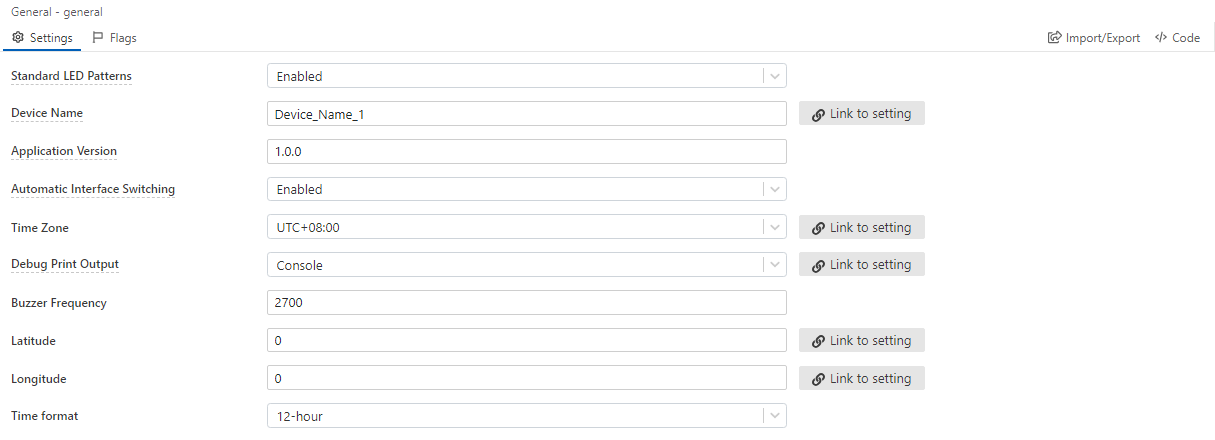
Click Link to setting and AppBlocks creates a setting for the property, with the right type and limits, and links them. The button changes to Unlink, and a tag shows the name of the new setting:


The value you enter in the property becomes the setting's default, and at runtime the feature reads the setting. See Creating and Exposing Settings for the full list of linkable properties and how to link to an existing setting.
Exposing settings to users
A setting is only visible to users when you add it to a dashboard. Each dashboard organizes settings in groups, and each group becomes a tab.
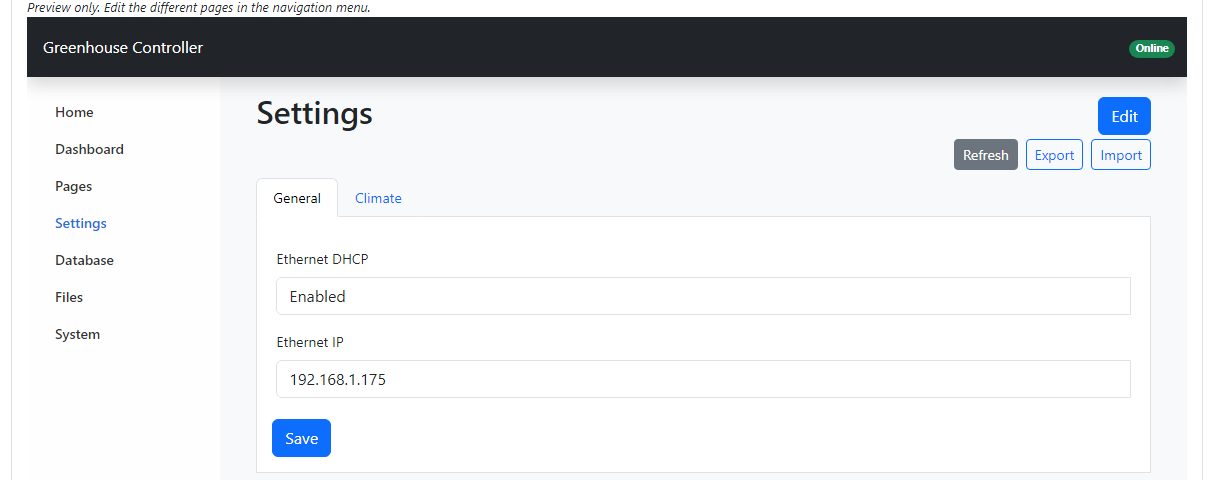
In the Web Console, open Features › Web Console, go to Settings in the console preview and click Edit. Add a group, then add the settings it should show:
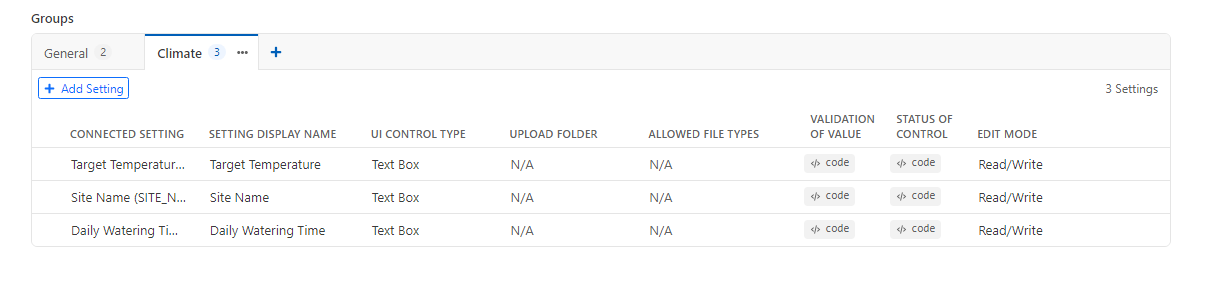
Each entry connects a setting to a control and decides how it is shown:

| Property | Description |
|---|---|
| Connected Setting | The setting this control edits. |
| Setting Display Name | The label shown to users. It is filled in from the setting's description. |
| UI Control Type | Text Box, Password, Dropdown (with a list of options), IP Address, or File Upload (text settings in the Web Console only). |
| Validation of Value | Optional JavaScript that returns an error message, or an empty string if the value is valid. Without it, values are checked against the setting's Minimum and Maximum. |
| Status of Control | Optional JavaScript that returns enabled, disabled or hidden, so a control can depend on other values. |
| Edit Mode | Read/Write, or Read Only to only display the value. |
A setting can appear only once per dashboard. The same groups model is used by LUIS, DS Manager, LCD menus and AppBlocks Cloud.
When a user saves a new value, the device stores it immediately and updates the variable. There is no reboot, and On Variable Changed fires if the value changed. A linked feature property is read wherever the feature uses it, so properties a feature applies once at startup, such as IP addresses, take effect after the next reboot.
Troubleshooting
| Message in Problems | What to do |
|---|---|
| Name conflict: … No duplicate names allowed. | Setting names share one namespace with variables, timers and other named items. Rename one of them. On TiOS, names that differ only in case also conflict. |
| Name must start with letter | Rename the setting, for example 1st_zone to zone_1. |
| Default value must be greater than / less than … Parameter | Move the default inside Minimum and Maximum. |
| Default string length must be less than Maximum Parameter | Shorten the default text or increase Maximum. |
| Settings are too large… (TiOS) | Reduce the number of settings or lower the Maximum of text settings. |
| … cannot be exposed more than once in … | Remove the duplicate entry from the dashboard's groups. |
| Setting is not defined | A dashboard entry has no Connected Setting. Choose one or delete the entry. |